Let’s Ship It: Your First Docker Container with Compose

In our previous post, we compared the assembly of cruise ship cabins to the Docker ecosystem:
- Docker Images are the pre-made cabins: complete snapshots that include application code, dependencies, tools, and settings. They work as reusable blueprints. Docker speeds up builds by caching layers and only rebuilding what has changed. Most people pull ready-made images from Docker Hub or the GitHub Container Registry (GHCR), so a full environment can launch in seconds.
- Docker Compose is the installation blueprint, usually a
docker-compose.ymlfile. It defines where every cabin goes, how services talk to each other, and how to launch a multi-container environment with a single command. - Docker Containers are the finished, occupied cabins: live, isolated instances created from an image. They stay lightweight because they share the host operating system’s kernel. You can start, stop, move, or delete a container without changing the image underneath.
- Docker Engine is the shipyard crew working behind the scenes. This background service builds images, manages container lifecycles, allocates resources, and handles networking.
With the basics down, it is time to set up your first container. Start by opening the official installation guide for your platform:
- Install Docker Desktop on Mac (Review Mac permission requirements)
- Install Docker Desktop on Windows (Review Windows permission requirements)
- Linux: Install Docker Engine (Make sure to also install the
docker-compose-plugin)
Mac and Windows users should install Docker Desktop. Linux users typically run Docker Engine directly, though Docker Desktop for Linux is also available. Since we are on Linux, we will walk through everything using the command line. The same commands work on every platform.
Docker does not have a special prompt of its own. It runs through your system’s standard terminal. Open a terminal on your OS with these shortcuts:
- Mac: Press
Cmd + Spaceto open Spotlight, typeTerminal, and pressReturn. Alternatively, go to Finder > Applications > Utilities > Terminal. - Windows: Press the
Windows Key, typePowerShellorWindows Terminal, and pressEnter. - Linux: Press
Ctrl + Alt + Ton most desktop environments, or open Terminal from your applications menu.
To confirm that the Docker command line tools are installed correctly, check the version:
docker --version
Next, test that Docker is running and that your account has permission to use it:
docker run hello-world
If that works, Docker will pull a tiny test image, run it inside a container, print a welcome message, and exit.
Assuming everything is working as expected, let’s start composing your first Docker container.
What is Docker Compose?
You will often hear this line: “Docker Compose is a tool for defining and running multi-container Docker applications using a single YAML configuration file (typically compose.yaml or docker-compose.yml).” That definition is accurate, but it skips the reason the tool is so useful.
There are two common ways to create a container.
The first is from the command line with docker run, just like the hello-world example above. This is popular because it is a single line you can copy and paste. It works, but it gets harder to manage over time. You have to keep a copy of the full command whenever you want to update the container or change a setting. Lifecycle management becomes messy.
The other option is Docker Compose. Compose uses a configuration file to store the important details. That file can describe a single container or a more complex setup with multiple containers, volumes, networks, and more. When you want the latest features or security patches, you can update everything with one command. The same is true for starting, stopping, or removing everything defined in the file. Long-term management becomes much easier.
Compose files are plain-text YAML files, so almost any text editor can open them. That makes it simple to tweak an existing setup or reuse the same configuration on different machines. Every platform has a text editor of some kind, so these files stay accessible. Many Docker management tools also rely on Compose files.
The short version: Compose makes long-term creation and management of Docker setups much easier.
Our Project: Kiwix Server
If you have the storage space, one of the most impressive things you can do is host Wikipedia at home. Kiwix Server makes that possible. It is a lightweight web server that serves content offline, so no internet connection is required. Better yet, it does not include trackers. The server is small and efficient enough to run comfortably on a Raspberry Pi.
Wikipedia is the destination. This first walkthrough is the test drive. We chose Kiwix because it is a strong first container: the image is small to download, and it gives you a visible result in a browser right away. Docker images range from a few megabytes to several gigabytes, and Kiwix sits on the smaller end of that range. The same is true of Kiwix content, so this demonstration uses two small ZIM files instead of the full English Wikipedia, which is about 115 GB.
To begin, open a command prompt and create a directory where you want to host Kiwix. You will need a simple folder structure of kiwix/data for the project and its files. You can usually create both directories with this command:
mkdir -p kiwix/data && cd kiwix
Note: You can do the same steps in a visual file manager such as Windows File Explorer or Mac Finder if that feels more comfortable.
In the kiwix directory, create a text file named docker-compose.yml. You can use any native text editor, such as Notepad on Windows, TextEdit on macOS, or Nano or Gedit on Linux. Put the following configuration in that file:
# The name of the Docker project.
# This prefix is used for all resources (networks, volumes) created by this file.
name: kiwix

# Defines the group of containers that make up this application.
services:

  # The internal name of this specific service within the Docker network.
  kiwix-serve:

    # The specific name to give the running container.
    # This makes it easier to identify when running 'docker ps' or 'docker logs'.
    container_name: kiwix-serve

    # The source image to download from the GitHub Container Registry.
    # 'latest' ensures you are using the most recent version available.
    image: ghcr.io/kiwix/kiwix-serve:latest

    # The restart policy.
    # 'unless-stopped' ensures the container starts automatically on boot
    # or after a crash, but won't restart if you manually stop it.
    restart: unless-stopped

    # Networking: Maps a port on your physical computer to a port inside the container.
    ports:
      # Format: [Host IP]:[Host Port]:[Container Port]
      # 127.0.0.1 ensures the service is ONLY accessible from your local machine.
      # It prevents anyone else on your Wi-Fi/Network from accessing the content.
      # The address to access Kiwix in your web browser is
      # http://localhost:8888 or http://127.0.0.1:8888
      - "127.0.0.1:8888:8080"

      # Note: If you used "8888:8080" alone, the service would be open to your
      # entire network. The address would be http://[your ip]:8888

    # Persistence: Links a folder on your computer to a folder inside the container.
    volumes:
      # Maps the './data' folder in your current directory to the '/data' folder
      # inside the container. This is where you should place your .zim files.
      - ./data:/data

    # The instruction passed to the container's entrypoint script.
    # This tells the Kiwix server to look for and serve all files ending in '.zim'
    # located within the /data directory.
    command: "*.zim"
The comments in that file explain each setting. Three choices matter most for this first container:
- Access stays on your machine only because of
127.0.0.1. For a first tutorial, that is the safer default. If you later want the service on your local network, change the port line to"8888:8080", then run the same start command again. - The host port is
8888instead of8080to avoid the usual collision with other web containers. You can change that host port to almost any unused number. - The volume line
- ./data:/datamaps thedatafolder next to your Compose file into the container. Download ZIM files intokiwix/data, and Kiwix Server can find them there.
To the Library!
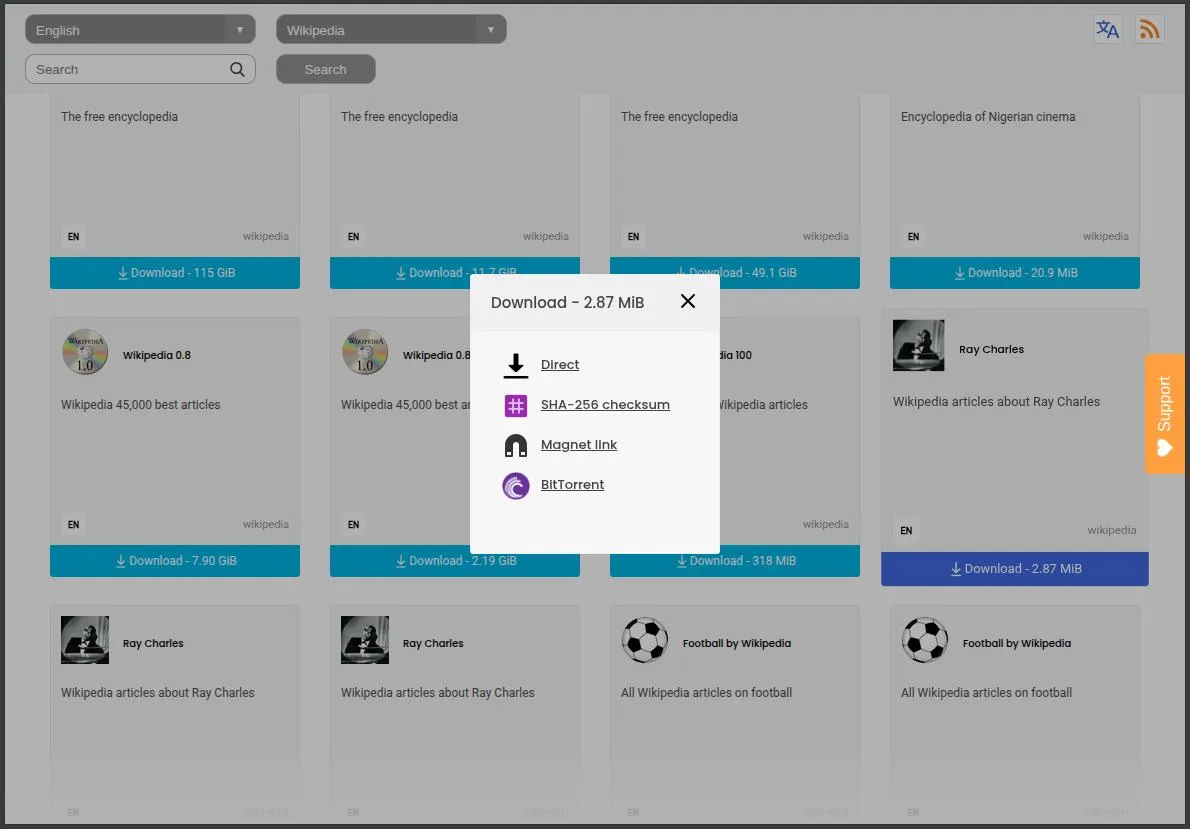
Kiwix Server is ready to serve content as soon as the container starts, so give it something to work with first. The Kiwix library at https://browse.library.kiwix.org/ has a wide range of downloadable content, from tiny collections to very large archives.
Use these library search pages to find two small examples: the Ray Charles Wikipedia articles (about 3 MB) and Docker (about 1.8 MB):
Those links open search results, not the files themselves. Open a result, download the .zim file, and save it into your kiwix/data folder. You can add more ZIM files to that same folder later. They will not show up in the library list until you restart Kiwix Server.
Start Your Engines!
Once you have created kiwix/docker-compose.yml and placed some ZIM files in kiwix/data, you are ready to start the container. Open a command prompt, switch to the kiwix directory, and run:
docker compose up -d
That one command tells Docker to read the configuration file, pull the image, and set everything up. On our nearly 6-year-old processor, it finished in seconds.

Check that the container is running:
docker compose ps
If you need more detail, follow the logs:
docker compose logs -f
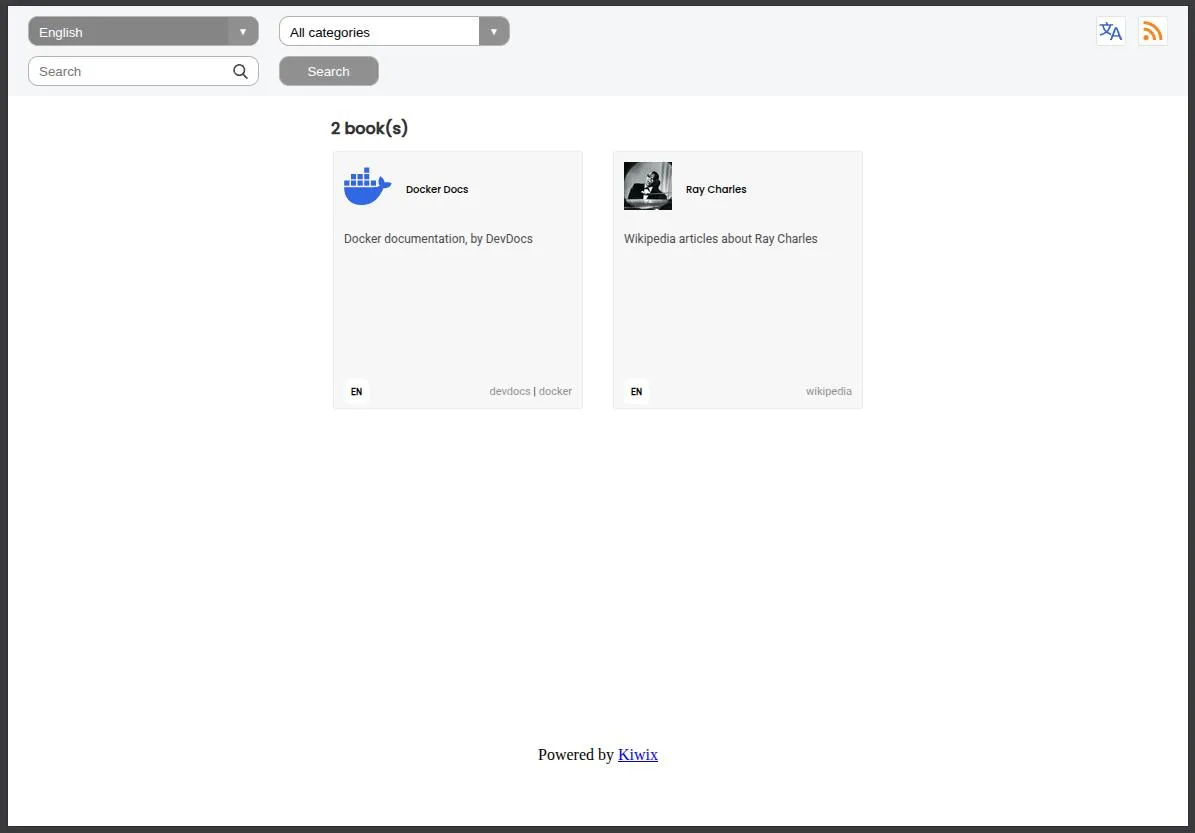
When the process completes, open http://localhost:8888/ in your browser. You should see the ZIM files you downloaded.
A few commands cover most of the day-to-day work. Run them from the kiwix directory:
docker compose up -d                 # start in the background
docker compose stop                  # stop without deleting
docker compose down                  # stop and remove the container
docker compose logs -f               # watch what the container is doing
docker compose up -d --pull always   # pull the latest image, then start again
docker compose down -v --rmi all     # stop the container and delete its image and unused volumes
Use that last command with care. It removes the container image and any Docker volumes created by this project. Your kiwix/data folder on disk should still keep the ZIM files you downloaded, because that folder is mapped from your computer. Still, this is the “clean it all out” option, not the everyday stop command.
If you edit docker-compose.yml, run docker compose up -d again from the kiwix directory to apply the change.
If Something Goes Wrong
These three issues show up most often on a first run:
- Docker is not running. Start Docker Desktop, or on Linux make sure the Docker service is up, then try
docker run hello-worldagain. - The library page is blank. Confirm that one or more
.zimfiles are insidekiwix/data, not just bookmarked search pages. Then rundocker compose up -dagain. The same is true when you download additional ZIM files. They will not be visible until you restart Kiwix Server. - The port is already in use. Change
8888in the Compose file to another unused host port, then rundocker compose up -dagain.
Other Resources
Docker Compose is everywhere now, which means you do not have to start every project from a blank file. If a post shares a docker run command, you can turn it into a Compose file with tools such as Composerize, IT-Tools, or ToolDock.org. They take the one-liner and give you YAML you can save, edit, and reuse.
If you want to run a Compose file on a network-attached storage (NAS) device that supports Docker, start with the manufacturer’s documentation. A Brave Search for Docker plus your NAS name or model will often turn up both official guides and community how-tos. Keep the hardware in mind. NAS boxes vary a lot in CPU and memory, so pick containers that fit the machine. We run Jellyfin on our Synology DiskStation because it is not resource hungry and the media already lives there. For Ollama, we use a mini-PC with a dedicated GPU and enough memory to support it.
Wrap Up
You just shipped a real container with Docker Compose. One file described the image, the ports, the data folder, and the restart behavior. One command brought it up. A handful of follow-up commands cover start, stop, logs, updates, and cleanup.
That is the point of Compose. docker run is fine for a quick test. A Compose file is what you keep when you want the same setup next week, on another machine, or after a security update.
Kiwix was the test drive. The same pattern works for the next cabin you want to add to the ship: find a trusted image, write a short docker-compose.yml, map only the folders and ports you need, and start it with docker compose up -d. From here, you can grow the library, open the service to your home network, or reuse this file as the template for the next project.
Docker and Docker Compose are what let many privacy-focused tools run locally, often without needing the internet after the first download. This was not a complete Docker setup or security course. The goal was to make the moving parts less mysterious. If you keep going, you may find what a lot of people find: it is easy to become a container hoarder, collecting tools and services that used to require a constant internet connection.
Remember: We may not have anything to hide, but everything to protect.